Superb rendition. Drawings (schematics) complete and unabridged. I do a great deal of vintage audio restoration. Documentation is essential for successful repairs. I have found sources over the years that offer good documentation, but rarely all that is necessary. Owner's Manuals has filled that void with complete and legible documentation. They have narrowed my "favorites" to a more manageable collection. This Denon manual in particular contained the latest revisions level, and offered alterations favorable to updating the item. The Illustrated Parts Breakdown (IPB) was well enough detailed to simplify part symbols and physical locations. You will not be disappointed!
very fast detailed and accurate hope to do business again
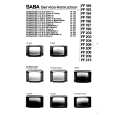
Text excerpt from page 15 (click to view)
DISASSEMBLY INSTRUCTIONS
1-5: DVD PCB/DVD DECK (Refer to Fig. 1-5) 1. Make the short circuit on the position as shown Fig. 1-5 using a soldering. If you remove the DVD Deck with no soldering, the Laser may be damaged. 2. Unlock the 2 supports 1. 3. Remove the Front Tray Plate in the direction of arrow (A). 4. Disconnect the following connectors: (CP2001, CP2301 and CP2302). 5. Remove the 4 screws 2. 6. Remove the DVD Deck in the direction of arrow (B). 7. Remove the 4 screws 3. 8. Remove the DVD PCB in the direction of arrow (C).
Front Tray Plate Make the short circuit using a soldering.
1 1
(A)
2 2
2
DVD Deck
2
Pick Up PCB
3
(B)
3 3
DVD PCB (C)
3
Deck Angle
Fig. 1-5 NOTE When the installation of the DVD Deck, remove all the soldering on the short circuit position after the connection of Pick Up PCB and DVD PCB connector.